When we moved into the new house, we brought over our IKEA braided tree that we purchased when we first lived in our apartment over 3 years ago. This little tree has always been pretty hearty, despite not getting the best sunlight and it hasn't ever been re-potted, but the day that we moved in December was in the single digits, and that seemed to be the end of the braided tree. It's leaves were all falling off and many of it's branches were turning brown, but L and I continued to water it for the next couple of weeks before deciding that it was time to start thinking of throwing it out. A few days later, I was looking at it more closely, and noticed that it was starting to bud new leaves! They were tiny, but it was something!
Now, just a few weeks later, the braided plant is thriving and basking in the sunlight in our front living room.
This tree is proof that apparently I don't kill all plants, which gives me hope for gardening this spring!
Saturday, January 30, 2010
Monday, January 25, 2010
Slacker
So, this week I've been kind of slacking off on keeping up with the blog. I've been battling a nasty cold since last Tuesday, and I'm finally not sneezing or blowing my nose every few minutes, so I think I've gotten over the worst of it. I'm hoping to make a change to the layout soon (adding a picture slide show of my Project 365 photos instead of always having a separate post designated to the photos that I have take over the week) so keep an eye out for that. I will also be posting the before and after pictures of the paint job that we've done in the basement pretty soon!
Here's a photo to leave you with for the evening:
Dwight looking super thrilled to be chilling on my shoulder... SUPER thrilled...
Here's a photo to leave you with for the evening:
Dwight looking super thrilled to be chilling on my shoulder... SUPER thrilled...
Monday, January 18, 2010
Orson the Owl
Last night, I made my first craft project from scratch (I even created my own pattern) and I am really proud of it!
A little background for those who didn't already know, I'm slightly owl-obsessed. I was originally going to make some sort of pillow our of the extra material from when I made my quilt, so I decided to make my own owl pillow! I looked around online for a pattern, but in the end I chose to just use THIS as my inspiration (and NOT pay $6 for a pattern that I could make myself).
My first step was to create and cut out my own pattern using scratch paper.
(Click on the photo to see a larger image of the pieces)
The next step was to start cutting out all of the pieces.
The nose, eyes, and iris pieces were all cut out from small squares of felt (dandelion, cream and brown colors). You can find this at your local fabric store for under $0.35/square.
The front bottom piece was cut from a cream Moleskin fabric (this fabric runs for about $8/yard- a little pricey, but I loved the contrast in the texture of the fabrics so it was totally worth the $4 I paid for 1/2 yard).
The rest of the pattern was cut from the cotton quilting pieces that I already had available
I used an air erasable fabric marker to trace the pattern onto the back of the fabric. When using an air erasable marker, make sure to never iron over it, as it will set the color into the fabric. Always allow the color to disappear before ironing!
After cutting out all of the pieces, I laid them all together properly to get a better idea of what my finished product would look like!
Then it was time to sew some of the pieces together with the sewing machine. First, I pinned like sides together to make a seam between the top and bottom pieces of the front of the pattern, and sewed about quarter inch seam. I then ironed the seam so that the pieces sat flush against each other.
Secondly, (after sewing the top of the pocket to the bottom of the pocket in the same fashion I sewed the front pieces together) the pocket was pinned and sewed to the back piece of the pattern. You can use any stick you like, but I liked the look of this one!
Close up of the stitch around the pocket
Lastly, I pinned on and sewed the wings using two different stitches (the more decorative one was used for the inner edges, while a more common straight stitch was used for the outer edges).
Then it was time to pin and sew on the felt pieces and buttons for the eyes and nose. I chose to handstitch each of these on in order to give it a more cozy homemade look.
First I sewed on the whites of the eyes...
...and then the irises...
...and finally the buttons! The button eyes are probably my favorite part of the project.
The nose was sewn on in the same fashion as the eyes.
Now that all of the pieces were put together, it was time to sew the front piece and the back piece together.
I started by lining up and pinning the pieces together so that it looked inside out, and then took to the sewing machine again! I sewed a quarter inch seam around the edge of the pillow, making sure to leave about a two inch gap between where I started and ended sewing for turning and stuffing.
Once I had finished sewing, I turned the piece right-side out through the 2 inch gap and used a chopstick to push out the edges (this especially helped push out the pointed ears part!).
After the pillow was completely turned, it was time to stuff! I had purchased a bag of pillow stuffing, and filled the pillow until I was satisfied with the overall look and plushness of the pillow.Once I had finished stuffing the pillow, I used an invisible stitch to close up the 2 inch gap that I had been using to turn and stuff.And then I was DONE!
This cute lil' guy now sits proudly on our couch!
Sunday, January 17, 2010
365 Sunday
This past week proved hard for me to remember to take pictures during the day, therefore, this week has a major food theme present because for some reason, it was easier for me to remember to take a picture while eating than while I was out and about during the day...
Monday (#10)
Monday (#10)
Yes, I realize that I am kind of cheating by using a picture that I have already posted, but the bean pie adventure were the only photos I took on Monday... plus I like how this one turned out!
Tuesday (#11)At one point or another, L had mentioned to me that he thought that the view from our sliding door that goes out to the deck would make for a cool photo... I agree, but I think it would look better if the poles to our gazebo weren't in the way!
Wednesday (#12)I decided that Darla needed a Peter Pan-ish hat mad out of resume paper to wear. She totally rocked the hat.
Thursday (#13)L came down with a nasty cold this past weekend, so we've been downing oranges and orange juice like there's no tomorrow!
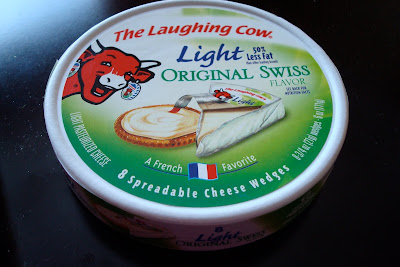
Friday (#14)My new favorite snack: Laughing Cow creamy swiss cheese spread on Club crackers. AMAZING! My mom took me to Costco on Friday, so I was able to stock up on these delicious wedges.
Saturday (#15)If you don't use Agave nectar, then you are missing out on one of the greatest sweeteners ever. I use it in my coffee instead of sugar, but you can also use it as a sugar substitute in cooking/baking! I haven't tried it yet, but I'm going to give it a whirl the next time I make cookies.
Sunday (#16)The last picture of the week is a preview of the first craft that I have really created on my own from scratch by only looking at an inspiration picture! Check back tomorrow to see exactly what it is and how I made it.
Thursday, January 14, 2010
The "Bad" Kids
I left my sub job today wishing that I could be there everyday. Today, I was over at an alternative school for at-risk kids who are mostly at-risk for not graduating. What I experienced today was amazing and I was pretty surprised by myself. I thought that today was going to be difficult and disheartening, but it was the exact opposite! Sure, there were kids who decided that they didn't feel like doing their work, but you can find that in any classroom you step foot into. These kids were more respectful towards me than I typically find in the mainstream schools. They were also upfront with me about what was going on with their personal life, and how it was affecting their school work. I've never taught a class with pregnant students before, but today I found myself discussing registering for baby showers and due dates, and looking at pictures of the babies they've already had. Though there were some more jaw-dropping, inappropriate topics that were being discussed in class (specifically centering on getting piercings on one's nether regions), and despite the fact that one girl came back from using the pass reporting that she had just seen someone getting their eyebrow and nose pierced in the large stall of the girl's bathroom, I felt more comfortable in that classroom than I did during my student teaching. It also didn't hurt that the classroom sizes were no larger than 20 students in the school, and the largest class that I personally taught today had 15 students, and the smallest had 7.
Something about these "bad" kids really touched me, and after what I have experienced today, I'm definitely thinking that I will try my hardest to land a teaching job at a similar alternative school for the fall.
Wednesday, January 13, 2010
Bean Pie
If you were to ask L to make a list of the meals I make on a regular basis, Bean Pie one would be at the top of the list. The first time I tried this recipe was at J's house (shout out to her blog over at the Secret Pie Shoppe!), and I loved it, so after finding the original recipe here on Martha Stewart's website, I decided to attempt to make it myself (with my own modifications) and we've been happily eating it ever since. Typically, this dish can feed the both of us for dinner and lunch the next day (and sometimes even with a bit left over) Monday night was actually the first time I've made in in over a month (packing up the apartment and moving into the house called for a lot of take out and deliver during that time), and B was over and able to enjoy it as well!
I apologize in advance for the non-logical way of taking pictures and that there aren't pictures of every step, but L forgot to remind me to gather up all the ingredients and my camera before I dived in to cooking... so it's totally all his fault.
Ingredients:
1.) Preheat oven to 400 degrees F, and trim tortillas to fit in a springform pan, using the bottom as a guide, and set aside.
2.) Heat oil in a large skillet over medium heat. 3.) Add onion, garlic, and cumin; season with salt and pepper. Cook, stirring occasionally, until softened, 5 to 7 minutes.
4.) Add beans and beer...
and bring to a boil. Reduce heat to medium; simmer until liquid has almost evaporated (this should take about 8 to 10 minutes, but I've had it take upwards of 20 minutes before, so just keep an eye on it).
5.) Once liquid has almost evaporated, stir in corn and remove from heat. Taste and adjust for seasoning.
6.) Fit a trimmed tortilla in bottom of springform pan; layer with 1/4 of the beans and enough cheese to over the bean mixture (add more or less depending on how much you like cheese!)
Repeat this step three times7.) Bake for about 20-25 minutes, or until the cheese melts.8.) Remove side of pan
9.) Finally, slice pie into wedges to serve! We enjoy Spanish rice as a side dish with the bean pie, but this meal is so hearty that you don't even need a side dish to go with it. Also, you'll notice how different L and I are when it comes to food- I like mine separated from each other with sour cream and no salsa (see above), while L, on the other hand, loves to drown his bean pie in salsa...
Overall, from start to finish, this meal takes about 1 hour to prepare and cook, and is completely vegetarian. I hope you enjoy this recipe as much as we do!
I apologize in advance for the non-logical way of taking pictures and that there aren't pictures of every step, but L forgot to remind me to gather up all the ingredients and my camera before I dived in to cooking... so it's totally all his fault.
Ingredients:
- 4 flour tortillas (10 inches)
- 2 tablespoons vegetable or canola oil
- 1 large onion, diced (I use a yellow onion, but it's personal preference)
- 2 garlic cloves, minced
- 1/2 teaspoon ground cumin
- Coarse salt and freshly ground pepper (to taste)
- 2 cans (15 ounces each) black beans, drained and rinsed
- 12 ounces beer (I prefer a light beer)
- 1 package (10 ounces) frozen corn
- 10 ounces cheddar cheese, shredded (3 cups)
1.) Preheat oven to 400 degrees F, and trim tortillas to fit in a springform pan, using the bottom as a guide, and set aside.
2.) Heat oil in a large skillet over medium heat. 3.) Add onion, garlic, and cumin; season with salt and pepper. Cook, stirring occasionally, until softened, 5 to 7 minutes.
4.) Add beans and beer...
and bring to a boil. Reduce heat to medium; simmer until liquid has almost evaporated (this should take about 8 to 10 minutes, but I've had it take upwards of 20 minutes before, so just keep an eye on it).
5.) Once liquid has almost evaporated, stir in corn and remove from heat. Taste and adjust for seasoning.
6.) Fit a trimmed tortilla in bottom of springform pan; layer with 1/4 of the beans and enough cheese to over the bean mixture (add more or less depending on how much you like cheese!)
Repeat this step three times7.) Bake for about 20-25 minutes, or until the cheese melts.8.) Remove side of pan
9.) Finally, slice pie into wedges to serve! We enjoy Spanish rice as a side dish with the bean pie, but this meal is so hearty that you don't even need a side dish to go with it. Also, you'll notice how different L and I are when it comes to food- I like mine separated from each other with sour cream and no salsa (see above), while L, on the other hand, loves to drown his bean pie in salsa...
Overall, from start to finish, this meal takes about 1 hour to prepare and cook, and is completely vegetarian. I hope you enjoy this recipe as much as we do!
Subscribe to:
Posts (Atom)